How To Install VMware Server 2 On Ubuntu 9.04
This tutorial provides step-by-step instructions on how to install VMware Server 2 on an Ubuntu 9.04 desktop system. With VMware Server you can create and run guest operating systems ("virtual machines") such as Linux, Windows, FreeBSD, etc. under a host operating system. This has the benefit that you can run multiple operating systems on the same hardware which saves a lot of money, and you can move virtual machines from one VMware Server to the next one (or to a system that has the VMware Player which is also free).
Also, with VMware Server you can let your old Windows desktop (that you previously converted into a VMware virtual machine with VMware Converter.This can be useful if you depend on some applications that exist for Windows only, or if you want to switch to Linux slowly.
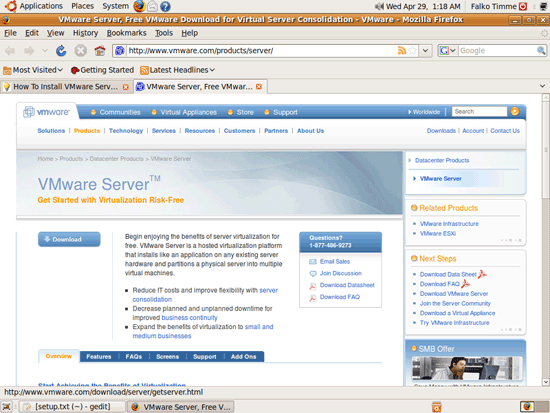
To download VMware Server, go to http://www.vmware.com/products/server/ and click on Download:
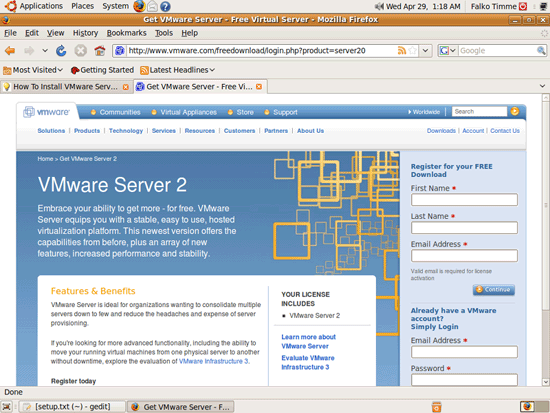
On the next page, log in with your existing VMware account or create a new one:
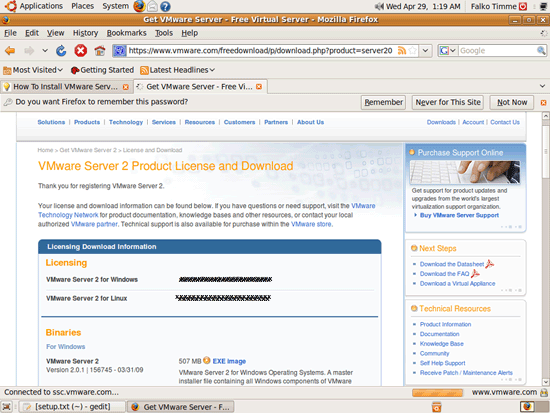
Follow the on-screen instructions. At the end, you should receive an email with a link to your download page. On the download page, you should see two license numbers, one for Windows and one for Linux. Write down or save the one for Linux and scroll down.
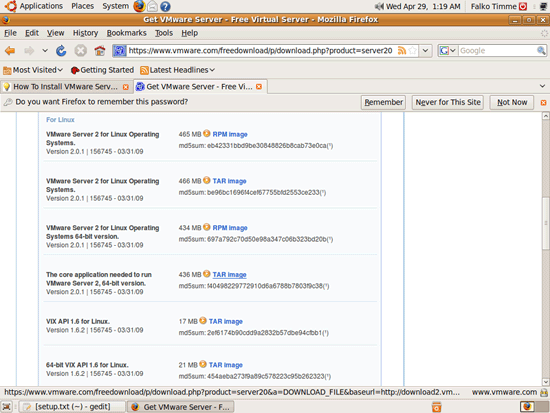
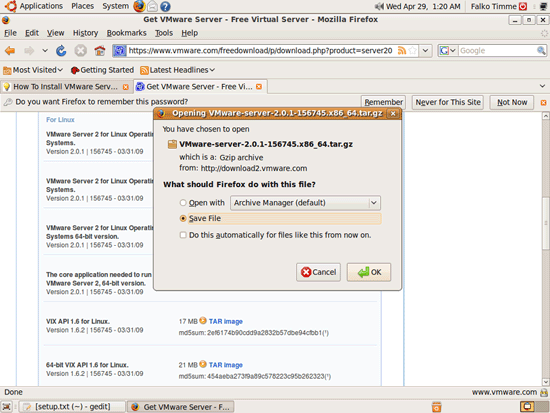
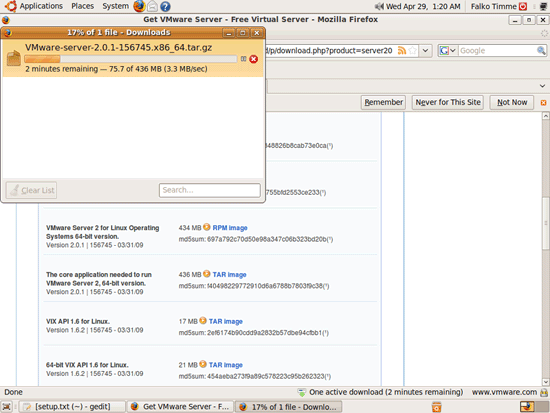
Then download the VMware Server for Linux TAR image (not the RPM image!) to your desktop (e.g. to /home/falko/Desktop). Make sure you pick the right one for your architecture (32-bit or 64-bit):
Then open a terminal (Applications > Accessories > Terminal) and run the following command to install some necessary packages:
sudo aptitude install linux-headers-`uname -r` build-essential xinetd
Then go to the location where you saved the VMware Server .tar.gz file
Unpack the VMware Server .tar.gz file and run the installer:
tar xvfz VMware-server-*.tar.gz
cd vmware-server-distrib
sudo ./vmware-install.pl
The installer will ask you a lot of questions. You can always accept the default values simply by hitting <ENTER>.
When the installer asks you
In which directory do you want to keep your virtual machine files?
[/var/lib/vmware/Virtual Machines]
you can either accept the default value or specify a location that has enough free space to store your virtual machines.
At the end of the installation, you will be asked to enter a serial number:
Please enter your 20-character serial number.
Type XXXXX-XXXXX-XXXXX-XXXXX or 'Enter' to cancel:
Fill in your serial number for VMware Server.
If you have accepted all default values during the installation, root is now the VMware Server login name. On Ubuntu, root has no password by default, therefore we create a password now:
sudo passwd root
OR
Because Ubuntu does not use the root user account we also need to setup access for your main user. Replace root with your username on line 10 of: /etc/vmware/hostd/authorization.xml (ACEDataUser).
At this point I had to restart my machine to put the changes in place. I did try restarting the service(s) after changing the config, but it still didn't allow access.
VMware Server 2 does not have a desktop application for managing virtual machines - this is now done through a browser (e.g. Firefox). You can access the management interface over HTTPS (https://<IP ADDRESS>:8333) or HTTP (http://<IP ADDRESS>:8222); the management interface can be accessed locally and also remotely. If you want to access it from the same machine, type https://127.0.0.1:8333 or http://127.0.0.1:8222 into the browser's address bar.
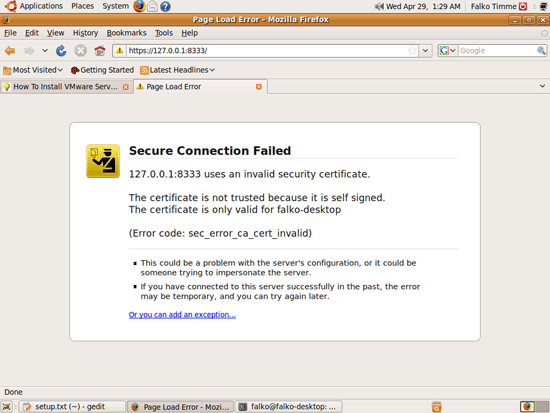
If you're using Firefox 3 and use HTTPS, Firefox will complain about the self-signed certificate, therefore you must tell Firefox to accept the certificate - to do this, click on the Or you can add an exception... link:
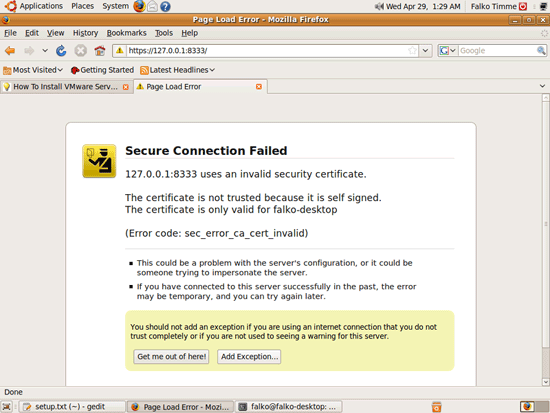
Click on Add Exception...:
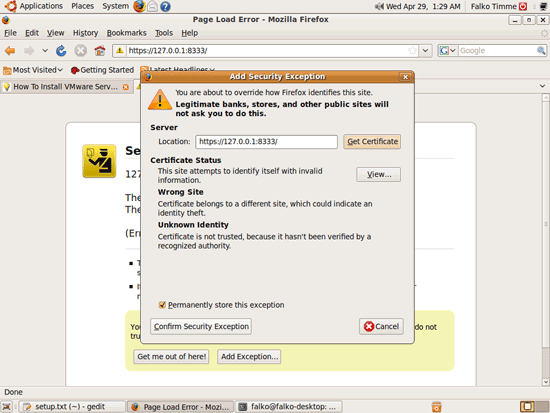
The Add Security Exception window opens. In that window, click on the Get Certificate button first and then on the Confirm Security Exception button:
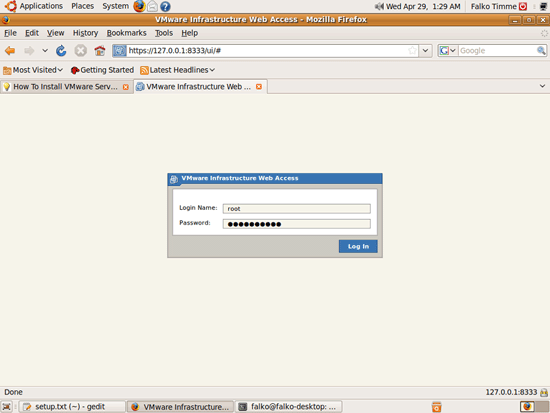
Afterwards, you will see the VMware Server login form. Type in root and the password you've just created:
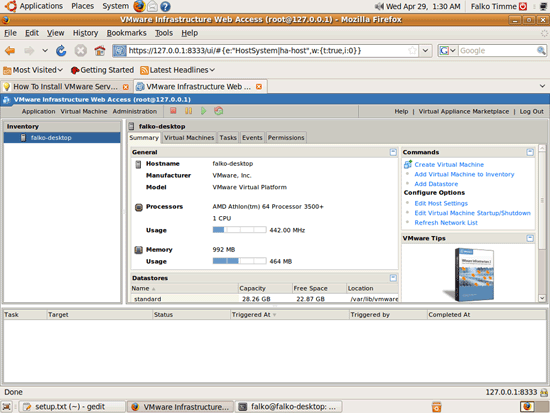
This is how the VMware Server web interface looks. The structure is similar to the old VMware Server 1 desktop application, so the usage of the web interface is pretty straightforward.
This tutorial provides step-by-step instructions on how to install VMware Server 2 on an Ubuntu 9.04 desktop system. With VMware Server you can create and run guest operating systems ("virtual machines") such as Linux, Windows, FreeBSD, etc. under a host operating system. This has the benefit that you can run multiple operating systems on the same hardware which saves a lot of money, and you can move virtual machines from one VMware Server to the next one (or to a system that has the VMware Player which is also free).
Also, with VMware Server you can let your old Windows desktop (that you previously converted into a VMware virtual machine with VMware Converter.This can be useful if you depend on some applications that exist for Windows only, or if you want to switch to Linux slowly.
To download VMware Server, go to http://www.vmware.com/products/server/ and click on Download:

On the next page, log in with your existing VMware account or create a new one:

Follow the on-screen instructions. At the end, you should receive an email with a link to your download page. On the download page, you should see two license numbers, one for Windows and one for Linux. Write down or save the one for Linux and scroll down.

Then download the VMware Server for Linux TAR image (not the RPM image!) to your desktop (e.g. to /home/falko/Desktop). Make sure you pick the right one for your architecture (32-bit or 64-bit):


Then open a terminal (Applications > Accessories > Terminal) and run the following command to install some necessary packages:
sudo aptitude install linux-headers-`uname -r` build-essential xinetd
Then go to the location where you saved the VMware Server .tar.gz file
Unpack the VMware Server .tar.gz file and run the installer:
tar xvfz VMware-server-*.tar.gz
cd vmware-server-distrib
sudo ./vmware-install.pl
The installer will ask you a lot of questions. You can always accept the default values simply by hitting <ENTER>.
When the installer asks you
In which directory do you want to keep your virtual machine files?
[/var/lib/vmware/Virtual Machines]
you can either accept the default value or specify a location that has enough free space to store your virtual machines.
At the end of the installation, you will be asked to enter a serial number:
Please enter your 20-character serial number.
Type XXXXX-XXXXX-XXXXX-XXXXX or 'Enter' to cancel:
Fill in your serial number for VMware Server.
If you have accepted all default values during the installation, root is now the VMware Server login name. On Ubuntu, root has no password by default, therefore we create a password now:
sudo passwd root
OR
Because Ubuntu does not use the root user account we also need to setup access for your main user. Replace root with your username on line 10 of: /etc/vmware/hostd/authorization.xml (ACEDataUser).
At this point I had to restart my machine to put the changes in place. I did try restarting the service(s) after changing the config, but it still didn't allow access.
VMware Server 2 does not have a desktop application for managing virtual machines - this is now done through a browser (e.g. Firefox). You can access the management interface over HTTPS (https://<IP ADDRESS>:8333) or HTTP (http://<IP ADDRESS>:8222); the management interface can be accessed locally and also remotely. If you want to access it from the same machine, type https://127.0.0.1:8333 or http://127.0.0.1:8222 into the browser's address bar.
If you're using Firefox 3 and use HTTPS, Firefox will complain about the self-signed certificate, therefore you must tell Firefox to accept the certificate - to do this, click on the Or you can add an exception... link:

Click on Add Exception...:

The Add Security Exception window opens. In that window, click on the Get Certificate button first and then on the Confirm Security Exception button:

Afterwards, you will see the VMware Server login form. Type in root and the password you've just created:

This is how the VMware Server web interface looks. The structure is similar to the old VMware Server 1 desktop application, so the usage of the web interface is pretty straightforward.


Post a Comment